ECS private cluster along with Private integration using an internal Application Load Balancer for an Amazon API Gateway HTTP API
1. Creation of ECS cluster with EC2 launch type
Created a ECS cluster with EC2 launch type named kbt-private-msmd-cluster placed inside the kbt_vpc on a Private subnets.
2. Creation of task definition and service on the cluster
Created a task definition for running our microservice. While creating service for the task ,place it inside the cluster that is created on 1st step.
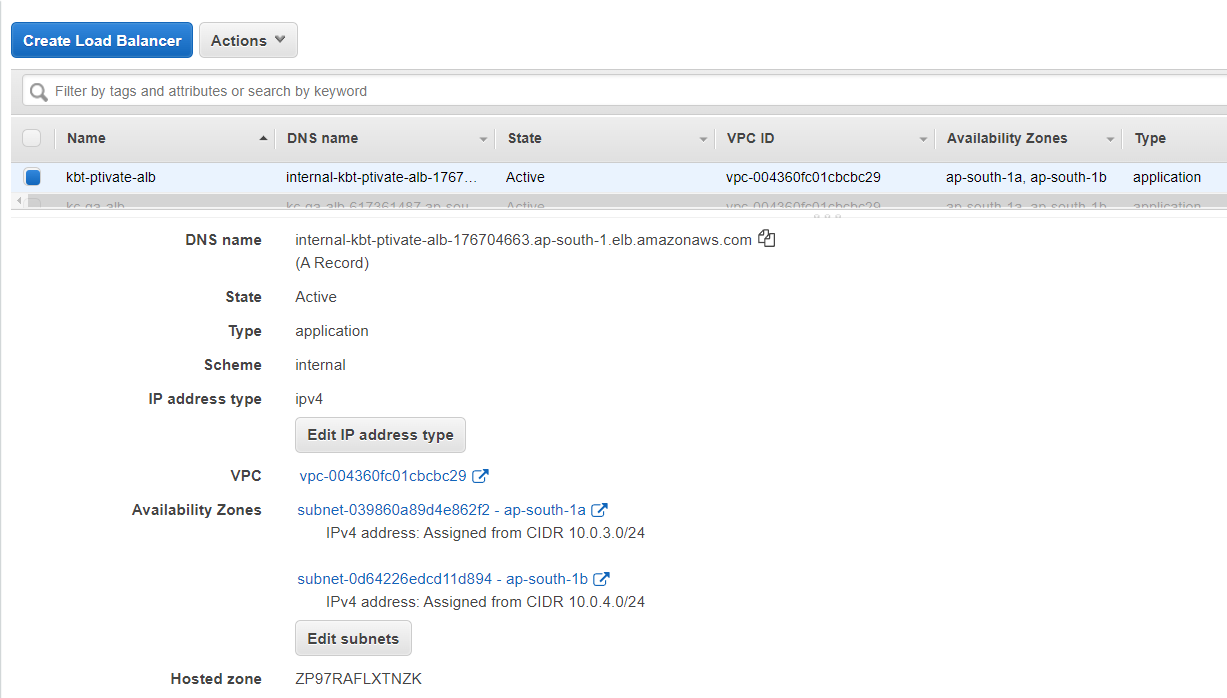
3. Creation of internal Load balancer
Created a Application Load Balancer as Internal scheme placed inside the private subnets.
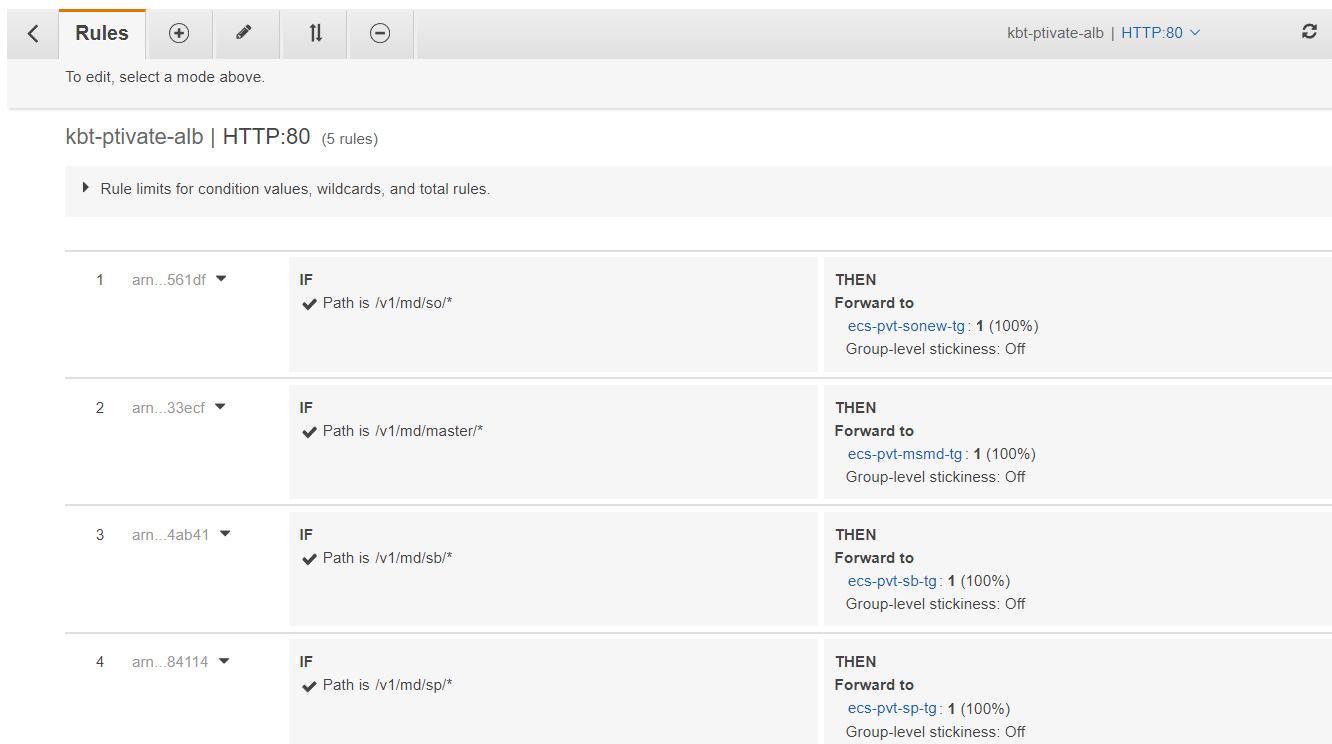
4. Creation of HTTP:80 listener
Created a HTTP:80 listener for this load balancer and attach the target group of services running.
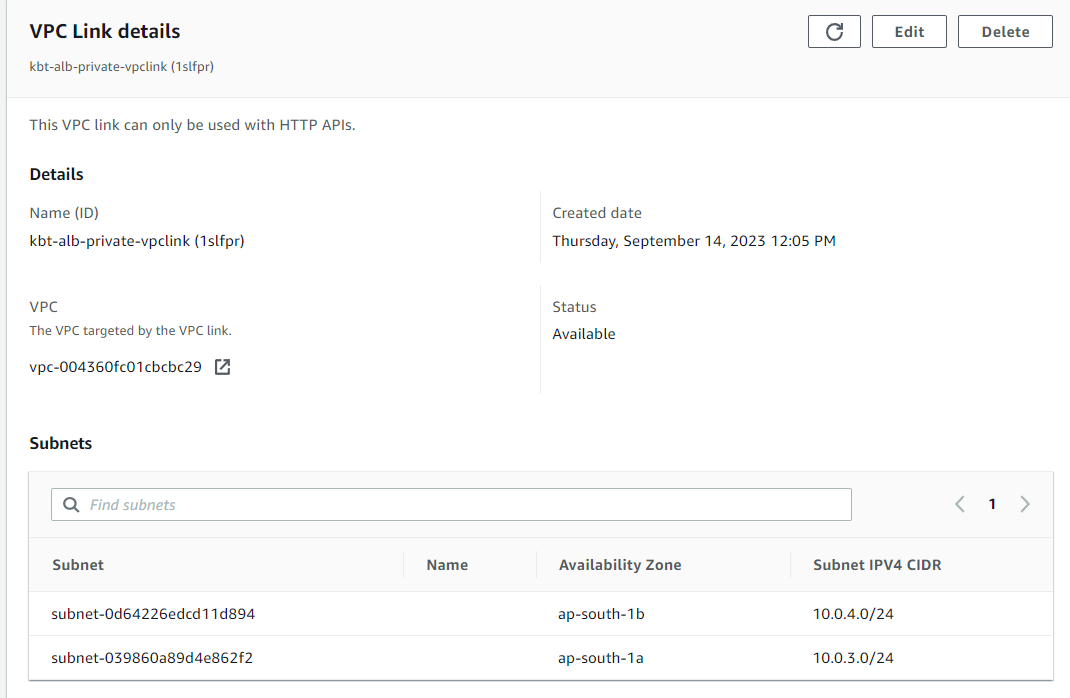
5. Creation of VPC link to access the private resources
Create the VPC link by refering the following steps,
-
Open the API gateway console, and in the navigation pane choose VPC links.
-
From VPC Links, choose Create.
-
From Choose a VPC link version, choose VPC link for HTTP APIs.
-
For Name, enter a name for your VPC link.
-
Choose the VPC dropdown list, choose a VPC for your Application Load Balancer to connect to.
-
For Subnets, choose private subnets to include in the VPC link.
-
For Security group, Select existing security group
-
Then choose Create.
6. Creation of HTTP API
Create an HTTP API and route by refering the following steps,
-
Open the API gateway console, and then choose Create API.
-
For HTTP API, choose Build.
-
For API name, enter a name, and then choose Next.
-
For Configure routes, choose Next.
-
For Configure stages, choose Next, and then choose Create.
-
In the navigation pane, choose Routes, and then choose Create.
-
For Method, choose ANY.
-
For path, enter /{proxy+} and choose Create.
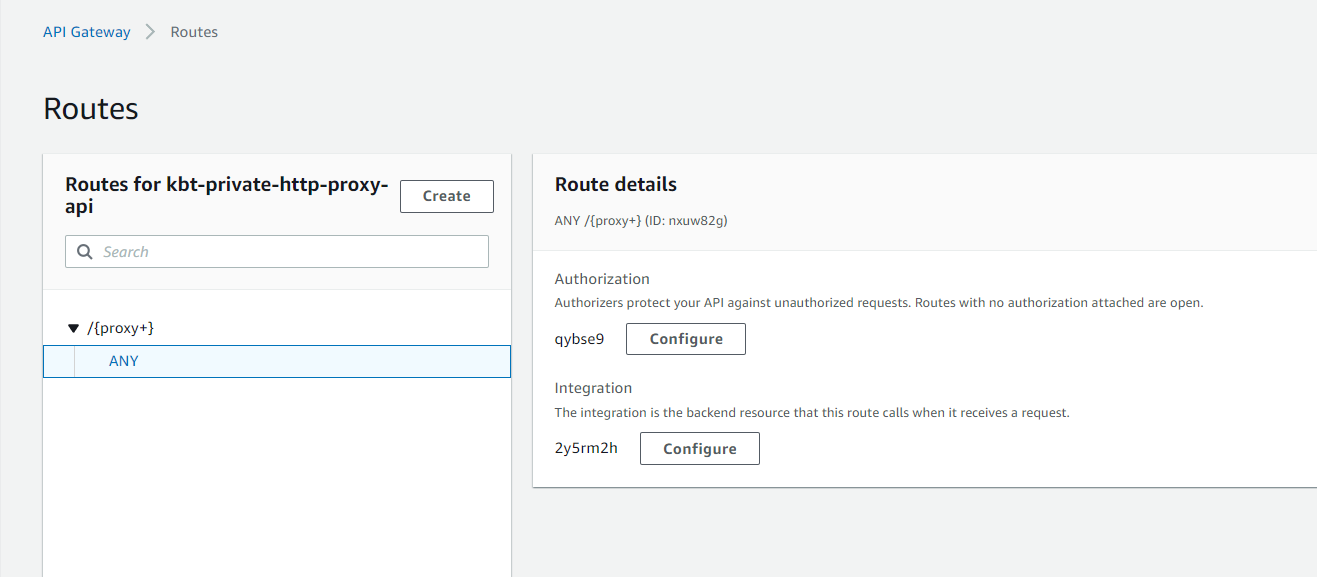
7. Creating and attaching integration for HTTP API
Create a private integration and deploy the HTTP API, by refering the following steps,
-
Open the API gateway console, and then choose the HTTP API created on Step-5.
-
In the navigation pane, choose Integrations.
-
For Integrations, choose Manage integrations, and then choose Create.
-
For Attach this integration to a route, choose ANY /{proxy+}.
-
For Integration target, choose Private resource.
-
For Integration details, choose Select manually.
-
For Target service, choose ALB/NLB.
-
For Load balancer, choose your load balancer.
-
For Listener, choose HTTP 80.
-
For VPC link, choose the VPC link created on step-5, and then choose Create.
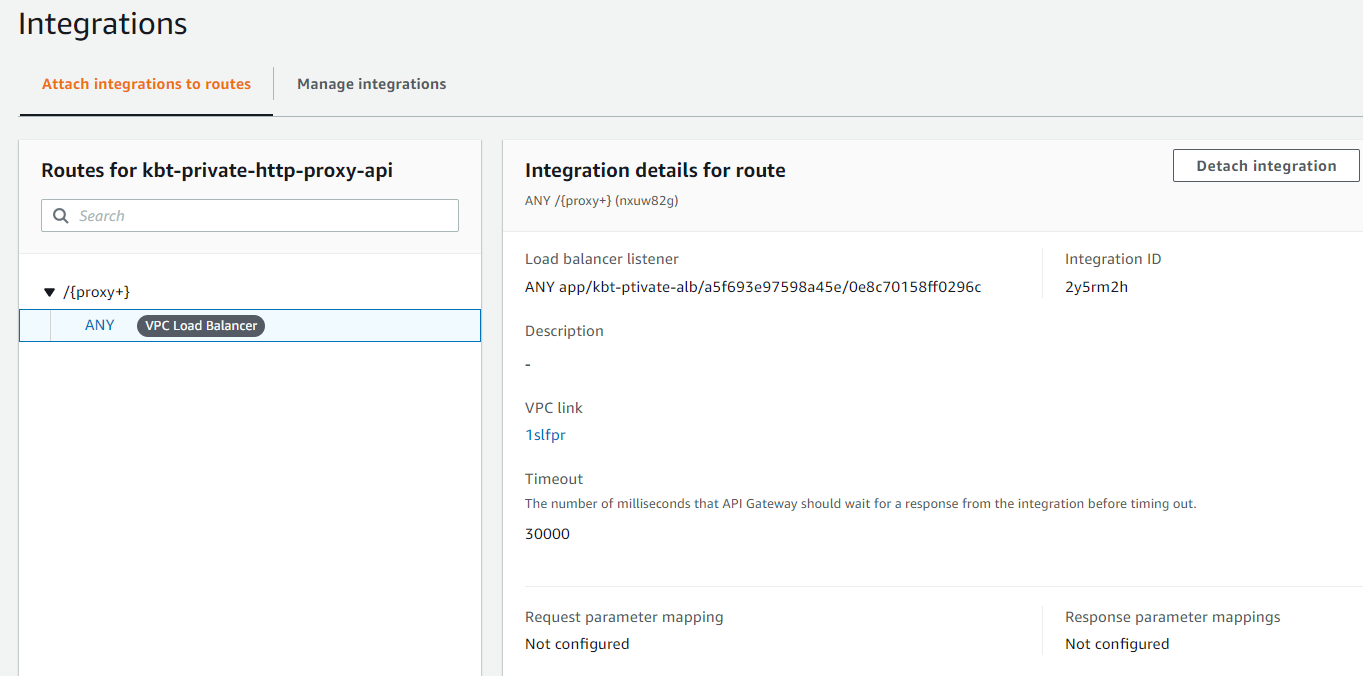
8. Creating and attaching authorization for HTTP API
To configure API authorization, refer the following steps,
-
Select Authorization from the left pane, select /Any path and choose Create and attach an authorizer.
-
For Authorizer type, select JWT.
-
select Identity source as $request.header.Authorization.
-
Provide Issuer URL as the keycloak OIDC endpoint issuer url.
-
Audience as mercotrace-india.
-
Choose create.
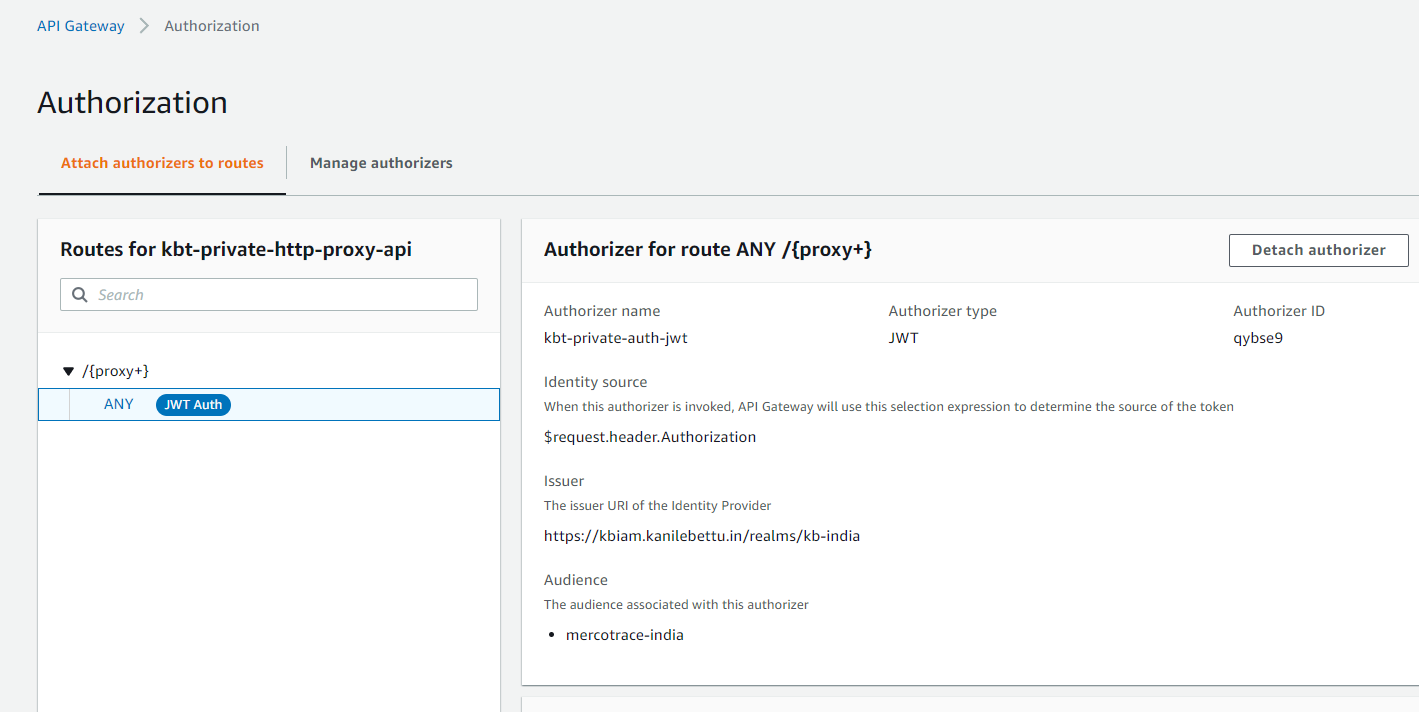
10. Setting up custom domain names for HTTP APIs
After deploying your API, you can invoke the API using the default base URL of the format:
https://api-id.execute-api.region.amazonaws.com/stage
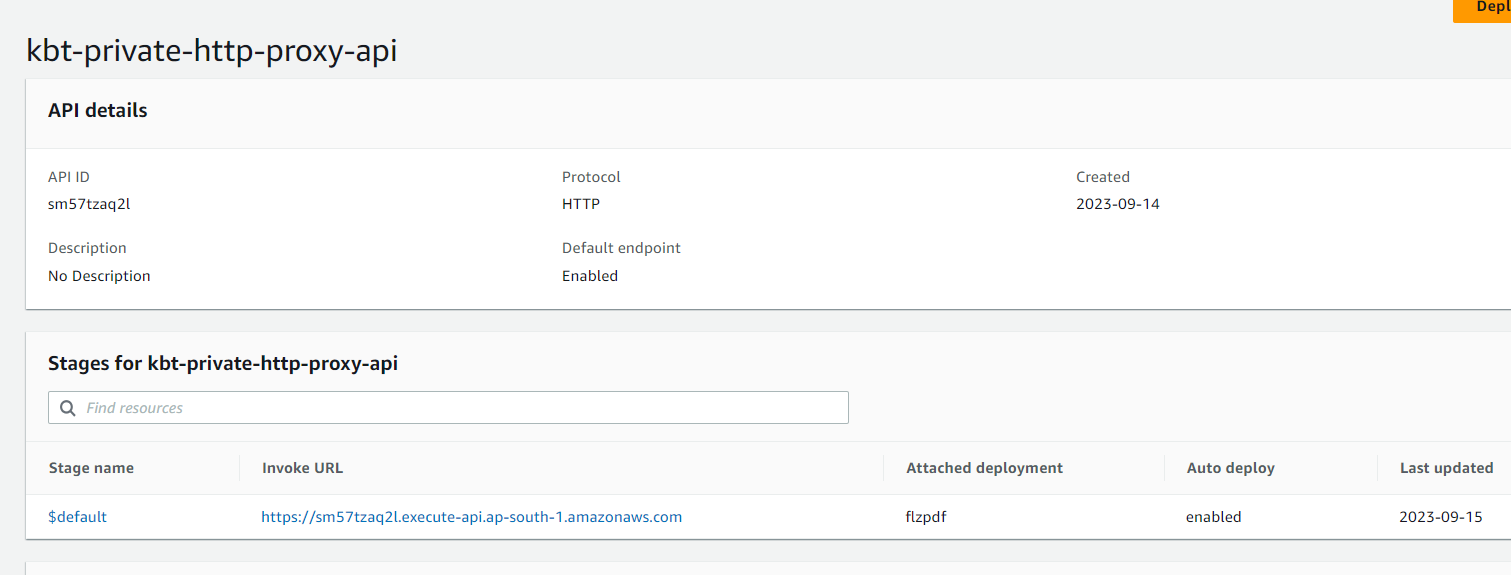
For converting this invoke url into user-friendly domain name, follow the steps below,
1. Select Custom Domain Names part on AWS API Gateway Console.+
2. Add domain name and select TLS version as TLS 1.2 .
3. Click on create API Gateway domain.
4. On API mapping tab pointing to a particular stage of http api that is created.
5. Route53 A record has to be created on the same name of API custom domain name for hosted zone.
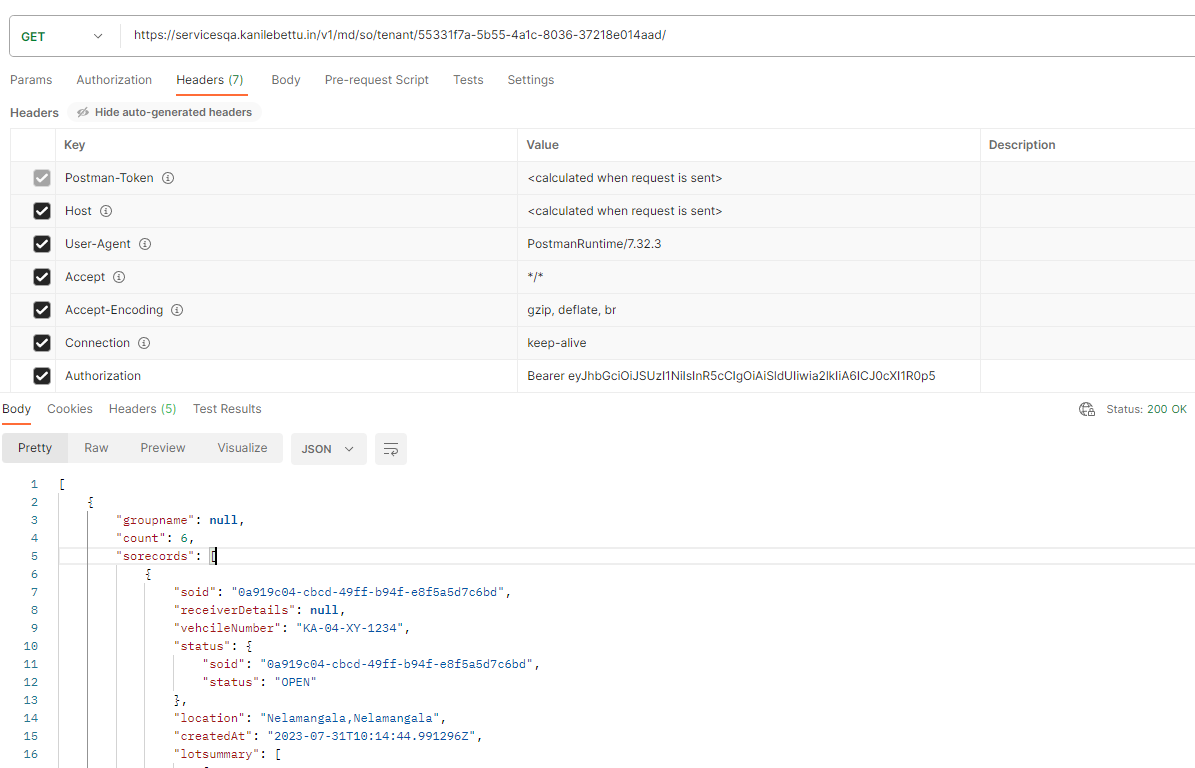
11. Testing the response on Postman
Copy the custom domain name that is registered along with the path and paste it into Postman . And on header add Authorization access token. For example, https://servicesqa.kanilebettu.in/v1/md/so/tenant/55331f7a-5b55-4a1c-8036-37218e014aad/